Here we go with a substantial Final Cut Pro X update to version 10.3. I’m gonna go thru the top features as you are gonna be able to find tutorials from different places.
New UI
No words here, take a peak.
Dark and minimalist UI. Things have moved around. Icons and buttons have been redesigned. The center bar with the timecode window separating browser and viewer(s) from the timeline has gone on a diet and that helps on small laptops. Part of its buttons (auto adjustments and speed changes) and the timecode window have moved to the bottom of the viewer.
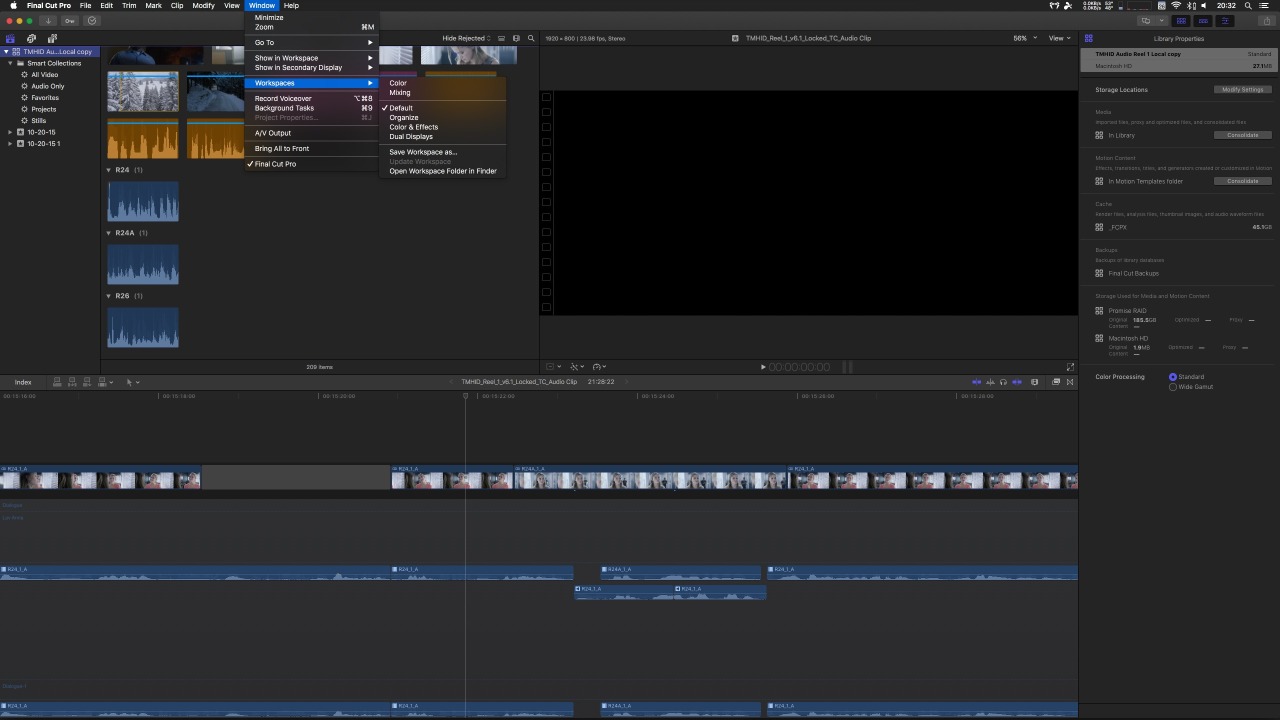
In the top right corner we can find the buttons to toggle the browser or timeline on/off and the secondary screen setup.
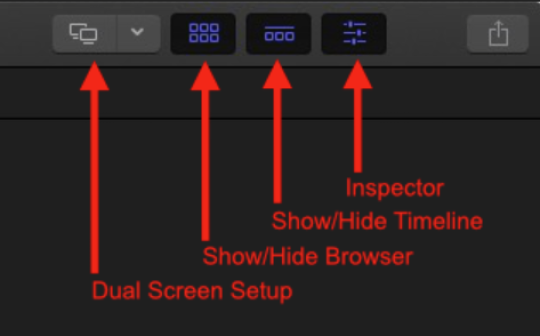
We can send the timeline to the secondary screen to have it take the whole screen or we can hide the browser and leave timeline and viewer on each monitor to focus on effects or color correction.
All this custom layouts can be saved and recalled at anytime and shortcuts applied to tem. Also we can toggle the height of the inspector to go all the way to the bottom of the screen to allow us to go thru all parameters or the audio channels of the clip(s).
Another 2 buttons that have been moved are the Media and Generators browsers. They are now located in the main browser and we can use that section to view the icons of photos from Aperture, iPhoto or the fotos app. This also brings the browser tools to this sections allowing the user to see and skim over the waveform of our iTunes library or a sound effects folder. Same with generators.


Magnetic Timeline 2.0
Yes, a revision on the main and unique feature of our favorite NLE. But what is it? Did you find difficult to navigate thru complex timelines? Enter Magnetic Timeline 2.0. Now we can visualize roles as lanes in the timeline. What’s a lane? it’s a real state division in the timeline that groups clips of the same role (or subrole). Using the timeline index we can bring the lanes on:
Then automagically all audio clips in the timeline get organized and separated using roles. Clicking on the 3 lines icon on the role in the timeline index does the same but this time it shows the lanes for subroles.
Reorganizing those roles and subroles in the Timeline Index shifts the order of the lanes in the timeline.

That way we can focus of editing dialogue first for example and when done we can drag music to the top and music clips are gonna move to the top of the timeline right under the video clips. Also there’s the focus function. When we click on the round icon on the role it minimizes all the other roles to get distractions out of the way.
Another cool thing about lanes is that once we are done with our edit we can create a compound clip with all clips so we can change levels, pan EQ and apply audio effects to those roles to mix as groups in a DAW.
To manage all those roles on a library basis we have a new role manager window in which we can create, delete, modify, merge and even apply colors to roles.

To merge 2 roles we change the name of one of them to match the other and all clips would be re-roled. Clicking the little color wheel icon brings the role color selector. We have up to 16 different ones.
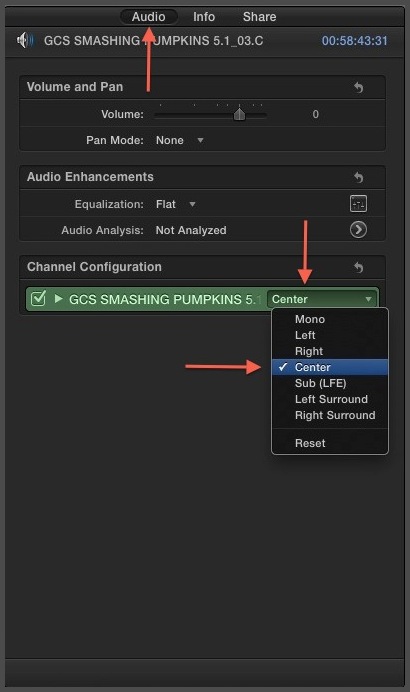
Dialogue, Music and Effects roles now get color coded automatically as FCPX has been detecting them since v1. We can also select clips in the browser or timeline and apply roles in groups. Clips can be “roled” on the import window and when we record voice over, we can assign a custom role to those clips as well. And to facilitate role tagging even more FCPX now reads the iXML created by audio recording devices and bring that info on media import. We can see that new preference:
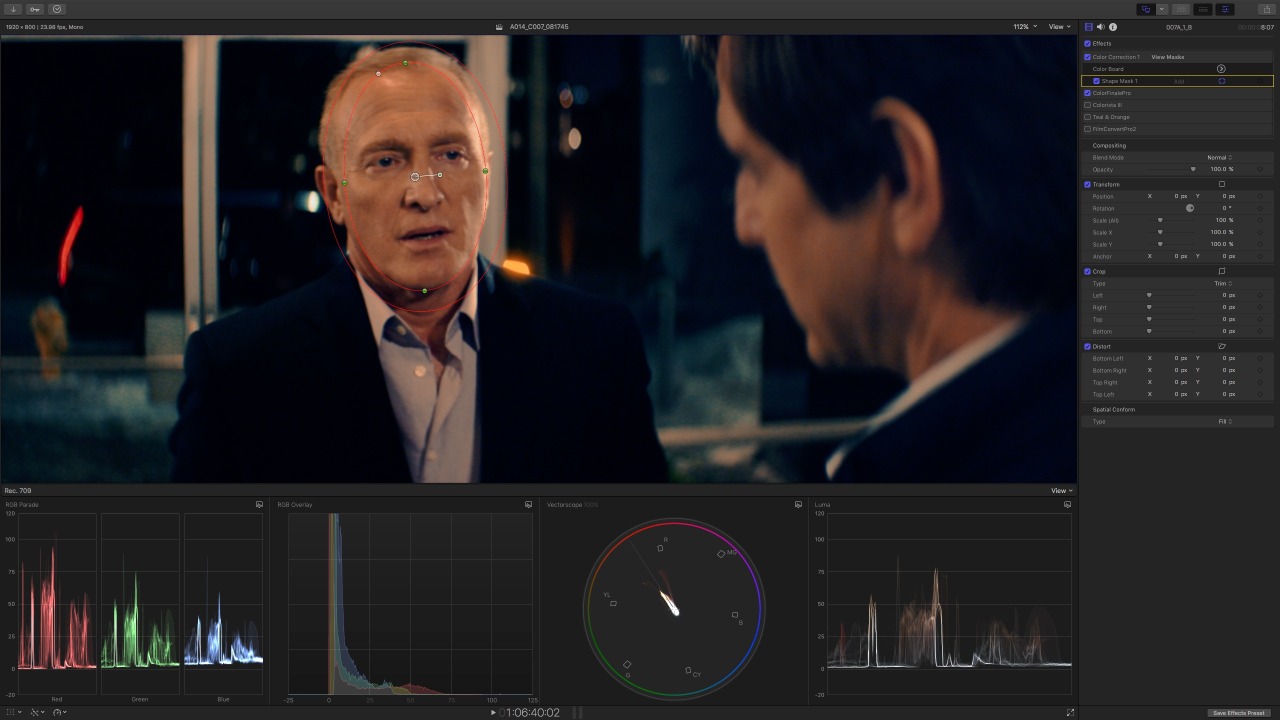
Wide Color Gammut
FCPX supports wide color gamut (WCG) video. View your images in wide color gamut on supported Mac computers (iMac 5K and new MacBook Pros) and external monitors. The built in LUTs are also in WCG and automatically applied to Canon, Sony, and ARRI clips. and easily manipulate Log and RED RAW footage in real time. The wide color gamut setting can be applied to both projects and libraries from the inspector after selecting them. So you can have a library and everything on it to be Rec 2020 but then have a specific project in Rec709. To help with broast levels there’s a new range check overlay in the Viewer to highlight wide gamut color areas in the image or areas over the limits of Rec709 (current broadcast spec). Video scopes accurately display wide color gamut correspondingly.
Remove Effects and Remove Attributes command
Yep, we’ve been long waiting for this. No explanation needed except remove effects has a specific shortcut that doesn’t bring the remove attributes window up and simply deletes all effects of a clip.
Timecode stuff
Ok, here I’m grouping timecode related things:
There’s a new timecode effect that not only displays the source timecode but the file name, this is really useful to send reference cuts to color for example or in a VFX review session where everybody needs to see on screen all that info.
Getting a document or spreadsheet with a buch of notes timecodes? The guys from Cupertino also brought back the ability to copy and past timecode in the timecode window to go straight o that point.
Professional Formats
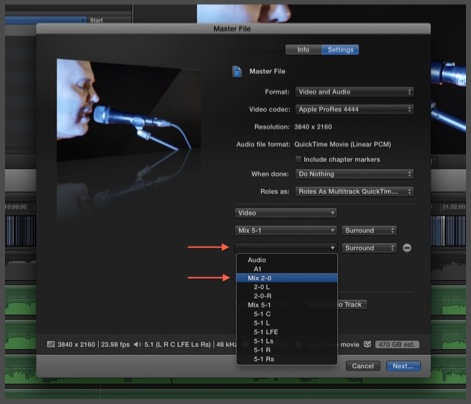
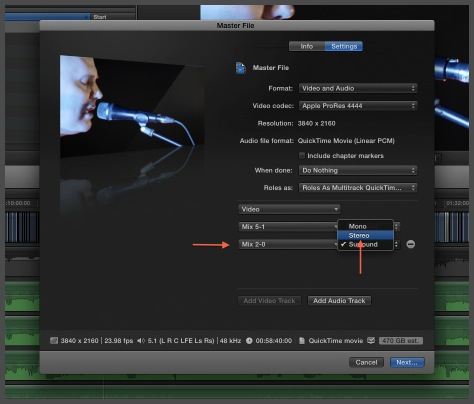
You read that right, professional (for the deniers). FCPX 10.3 brings more professional formats like MFX wrapped Prores files as a new broadcast standard. This combined with the roles on multitrack allows the user to deliver files with 5.1 and 2.0 structure required for TV channels. AVC-Intra is added as an export option as well.
Added support for Panasonic V-Log format, Sony XAVC-L at 4K for the Sony PXW-FS7 and PXW-X70 and Canon C300 12-bit video.
Flow Transition
Late to the party but welcome! Like Media Composer, Premiere or Resolve there’s a morph transition that makes seamless jump cuts. Native!
The little things
Last but not least, a list of random features:
- Store libraries on SMB3 volumes (to add to XSAN, StorNext and NFS support for shared environments)
- Continuous playback of clips in the Browser (for Wes Plate)
- Ability to roll trim on adjacent connected clips without being in a secondary storyline (Yay!)
- Search custom metadata in the Browser and timeline index and added for Auditions, Compound Clips, MulticamClips and Synchronized clips in the timeline index.
- XML updated to 1.6
- Drag elements from FCPX to compatible apps as XMLs. (This means you can drag and drop clips, events or projects from the FCPX browser to an app and that app will get an XML of them as input in one step without having to export an XML first and import the XML in compatible app)
- Consolidate custom Motion projects into the library. Share libraries with other editors and bring the custom Motion templates with them.
Recap
As you can see, there’s a bunch of new stuff. The important thing I read between lines of this update is that 95% of the features are for soccer moms editing cat videos (/sarcasm mode off). There is no doubt that this update goes to the professional user.
Now Apple, let’s focus in color correction…
Update
This awesome video by Thomas Grove Carter shows more little things here and there:
And the usual Ripple Training stuff can be found here
You can see some videos at the Apple website detailing some of the new timeline behavior: